


Settings Overview
In this article, you'll learn how to:
- Invite a collaborator
- Automatically include contact details on every playlist page
- Update name and logo
- Set default transcoding bitrate for high-res conversion to MP3
- Customize file naming conventions
- Choose available metadata fields on shared files
- Preset contact information that writes into Metadata Comments field
- Customize display settings: column width/height and the Track Info hover
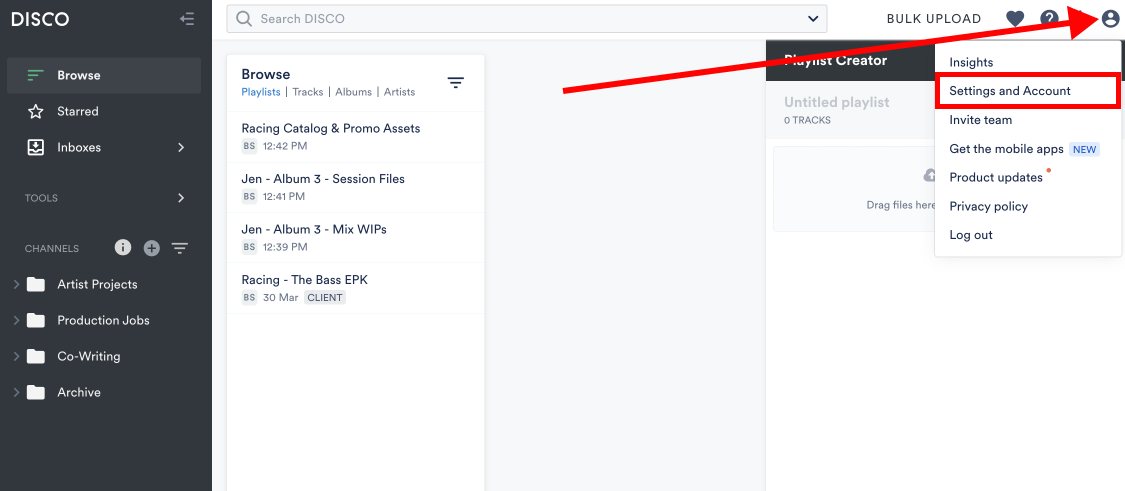
Open Settings
Invite Team Members
Inviting additional members to your DISCO account grants them access to your content.
Invite your Manager, A&R, bandmates or close collaborators.
The screenshot below highlights different parts of the My Team tab:
- My Team tab
- Invite team members to access your DISCO
- User menu
- Delete users or make them account Admins (if you are already an Admin)

Adding Contact Details to Playlists

- Open Settings > Profile & Account
- Fill out the "Contact details" text field
- Select the checkbox “Include contact details on my public DISCO pages”
- Click "Update Settings"

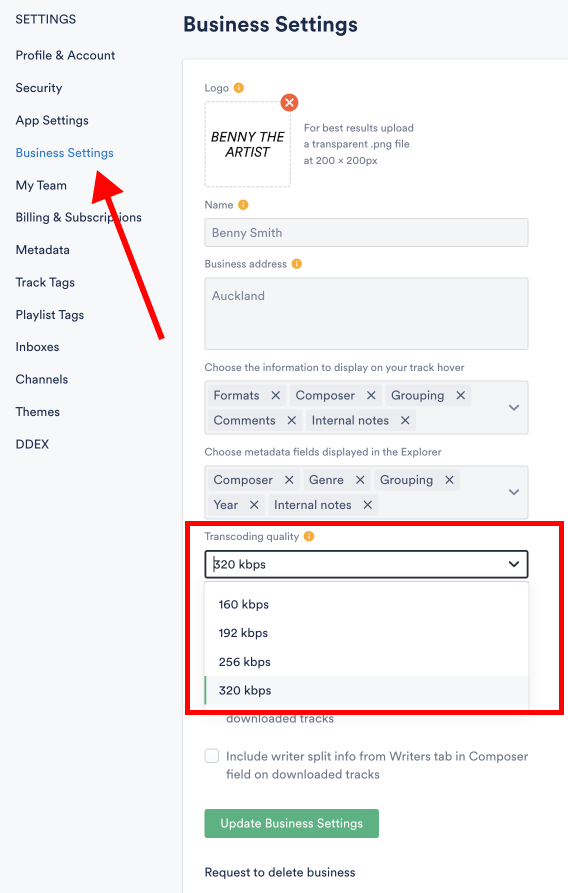
Updating Name and Logo
- Open Settings > Business Settings
- Add or update a logo
- Edit the Name field to update how your company name appears in inter-DISCO sharing
- Click Update Business Settings
Reach out to our Support team to make changes to the business URL, e.g. recordlabel.disco.ac.
Setting the Transcode Rate
When you upload WAVs or AIFFs, DISCO will transcode them to create an MP3 for fast streaming. Transcoding quality options are found in the Business Settings tab.
Writing New File Names
Set your own file naming convention by combining different attributes: Artist, Title, Album, Year, Original File Name, Business Name, etc.

The file name will be written in the order set with a dash (-) between each attribute: e.g. "artist - title - year - originalfilename.wav".
Metadata Settings
Preset Your Contact Info in Metadata
This setting allows you to add a custom message that will write into the comments metadata field when tracks download.
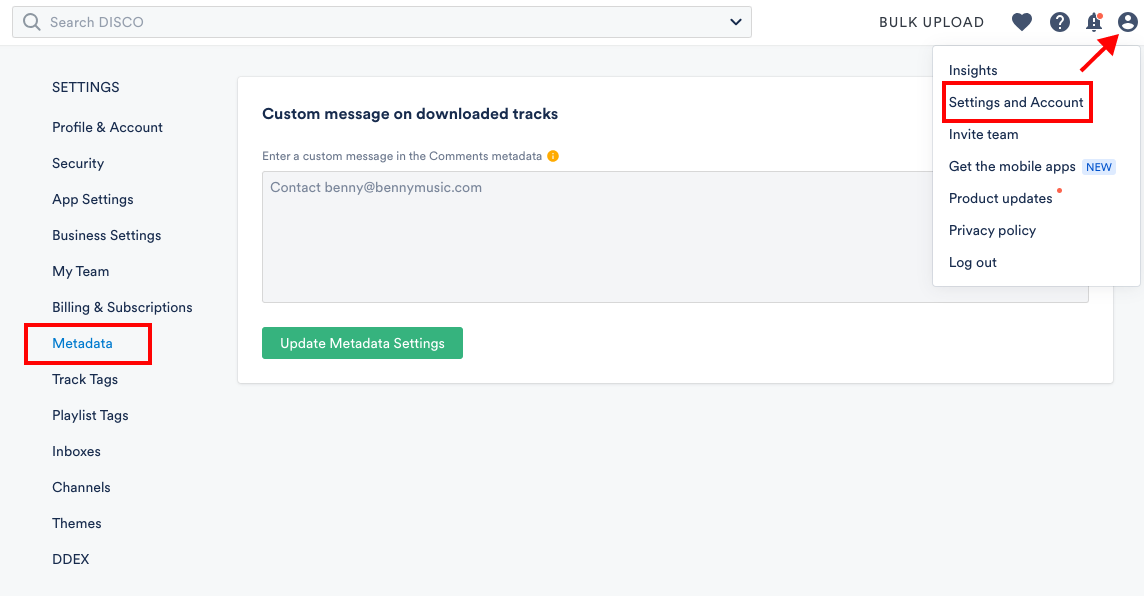
- Fill out the custom message, which writes into the Comments metadata field.
- This is the perfect way to include your contact information automatically on all tracks as they download.
- The message will prepend (write in-front) of text that is already present in the Comments field.
- The message is written to tracks as they download from a shared playlist page or when they are sent to another DISCO.
- The message will not be visible inside your DISCO metadata (see preview option below).
Metadata settings are specific to each seat/user; collaborators can set up their own metadata settings, according to preference.

The above metadata settings will not be visible to you in DISCO, since they are only applied once files have been downloaded or are saved to other DISCOs.
Check out the preview area in the Track Info Editor to see what downloaded metadata will look like:

Explorer UI Settings
The “Explorer” refers to the middle area in DISCO for browsing playlists and tracks.

Column width and display density (height of playlists and tracks) can be adjusted:

- Open Settings > App Settings
- The dropdown menus have options for Explorer column width and Explorer display density

Track Info Hover
The Track Info hover shows a preview of useful track information and metadata:

Track Info hover settings have NO effect on metadata that travels on files or public playlists - they only impact what you see inside your DISCO.
- Open Settings > App Settings
- Open the dropdown menu “Choose the information to display on your track hover”
- Fields will display on the hover in the order you select them
- Popular options include Formats, Original File Name, and Upload Date

Don’t forget to click Update App Settings when you’re done.