


Starting a Bulk Upload
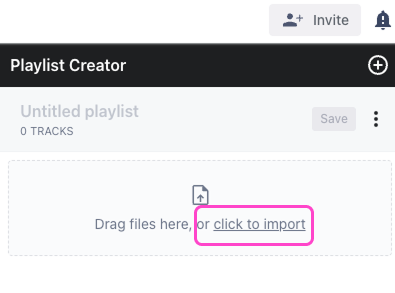
- Get started by downloading and installing the DISCO Uploader app off our website, or in the Playlist Creator on the "click here to import" popup.
- Launch the app and enter your DISCO URL, email, and password to log in.

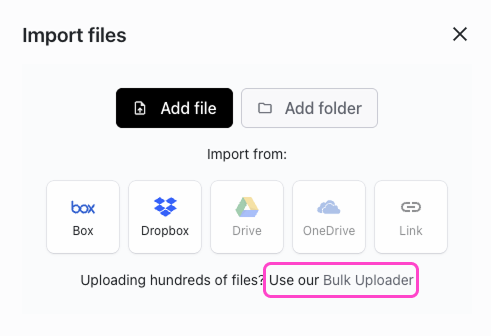
- Click “Add Folder,” then select the folder you’d like to upload from your hard drive onto DISCO:

Note that ZIP files won’t unpack in DISCO; make sure to unzip them before uploading to DISCO if you want to be able to access the files inside them!
Before starting a large upload, we recommend reading our articles on preparing a bulk upload and troubleshooting stalled transfers. This will save you a lot of time in organizing and cleaning up after the upload.
Find the Uploaded Folders in DISCO
Folders uploaded to DISCO through the Bulk Uploader automatically transform into playlists, which can be found in the Browse area.
- In this example, the highlighted Catalog folder was selected for upload.

- In this example, we see that The Checks album folders (nested within the containing artist folder for The Checks) automatically become playlists in DISCO when they’re ingested through the Bulk Uploader:

The parent folders in this case ("Catalog" and "The Checks") are not visible inside DISCO since they did not directly contain any files within them.
Next Steps
- You will receive an email notification once an upload is completed.
- Best practice is to then create Channels to organize uploaded playlists into folders that mimic your hard drive set up.